How to Contribute 
I would be very happy about any kind of contributions that help to improve and extend the functionality of biopandas.
Code of Conduct
If this is your first contribution, please review the Code of Conduct.
Quick Contributor Checklist
This is a quick checklist about the different steps of a typical contribution to biopandas and other open source projects. Consider copying this list to a local text file (or the issue tracker) and checking off items as you go.
- [ ] Open a new "issue" on GitHub to discuss the new feature / bug fix
- [ ] Fork the biopandas repository from GitHub (if not already done earlier)
- [ ] Create and checkout a new topic branch
- [ ] Implement new feature or apply the bug-fix
- [ ] Add appropriate unit test functions
- [ ] Run
nosetests -svand make sure that all unit tests pass - [ ] Check/improve the test coverage by running
nosetests --with-coverage - [ ] Add a note about the change to the
./docs/sources/CHANGELOG.mdfile - [ ] Modify documentation in the appropriate location under
biopandas/docs/sources/ - [ ] Push the topic branch to the server and create a pull request
- [ ] Check the Travis-CI build passed at https://travis-ci.org/rasbt/biopandas
- [ ] Check/improve the unit test coverage at https://coveralls.io/github/rasbt/biopandas
- [ ] Check/improve the code health at https://landscape.io/github/rasbt/biopandas
- [ ] Squash many small commits to a larger commit
Getting Started - Creating a New Issue and Forking the Repository
- If you don't have a GitHub account yet, please create one to contribute to this project.
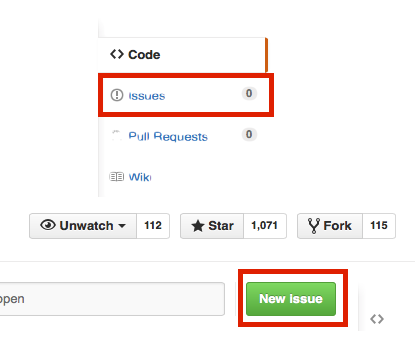
- Please submit a ticket for your issue to discuss the fix or new feature before too much time and effort is spent for the implementation.
- Fork the
biopandasrepository from the GitHub web interface.

- Clone the
biopandasrepository to your local machinegit clone https://github.com/<your_username>/biopandas.git
Syncing an Existing Fork
If you already forked biopandas earlier, you can bring you "Fork" up to date with the main branch as follows:
1. Configuring a remote that points to the upstream repository on GitHub
List the current configured remote repository for your fork by executing
$ git remote -v
If you see something like
origin  https://github.com/<your username>/biopandas.git (fetch)
origin  https://github.com/<your username>/biopandas.git (push)
you need to specify a new remote upstream repository via
$ git remote add upstream https://github.com/rasbt/biopandas.git
Now, verify the new upstream repository you've specified for your fork by executing
$ git remote -v
You should see following output if everything is configured correctly:
origin  https://github.com/<your username>/biopandas.git (fetch)
origin  https://github.com/<your username>/biopandas.git (push)
upstream    https://github.com/rasbt/biopandas.git (fetch)
upstream    https://github.com/rasbt/biopandas.git (push)
2. Syncing your Fork
First, fetch the updates of the original project's main branch by executing:
$ git fetch upstream
You should see the following output
remote: Counting objects: xx, done.
remote: Compressing objects: 100% (xx/xx), done.
remote: Total xx (delta xx), reused xx (delta x)
Unpacking objects: 100% (xx/xx), done.
From https://github.com/rasbt/biopandas
 * [new branch]      main         -> upstream/main
This means that the commits to the rasbt/biopandas main branch are now
stored in the local branch upstream/main.
If you are not already on your local project's main branch, execute
$ git checkout main
Finally, merge the changes in upstream/main to your local main branch by executing
$ git merge upstream/main
which will give you an output that looks similar to
Updating xxx...xxx
Fast-forward
SOME FILE1                    |    12 +++++++
SOME FILE2                    |    10 +++++++
2 files changed, 22 insertions(+),
Making Changes in a New Topic Branch
1. Creating a new feature branch
Please avoid working directly on the main branch but create a new feature branch:
$ git branch <new_feature>
Switch to the new feature branch by executing
$ git checkout <new_feature>
2. Developing the new feature / bug fix
3. Testing your code
Adding/modifying the unit tests and check if they pass:
$ nosetests -sv
$ nosetests --with-coverage
4. Documenting the changes
Please add an entry to the biopandas/docs/sources/CHANGELOG.md file.
If it is a new feature, it would also be nice if you could update the documentation in appropriate location in biopandas/sources.
5. Committing the changes
When you are ready to commit the changes, please provide a meaningful commit message:
$ git add <modifies_files> # or `git add .`
$ git commit -m '<meaningful commit message>'
6. Optional: squashing commits
If you made multiple smaller commits, it would be nice if you could group them into a larger, summarizing commit. First, list your recent commit via
$ git log
which will list the commits from newest to oldest in the following format by default:
commit 046e3af8a9127df8eac879454f029937c8a31c41
Author: rasbt <mail@sebastianraschka.com>
Date:   Tue Nov 24 03:46:37 2015 -0500

    fixed setup.py

commit c3c00f6ba0e8f48bbe1c9081b8ae3817e57ecc5c
Author: rasbt <mail@sebastianraschka.com>
Date:   Tue Nov 24 03:04:39 2015 -0500

        documented feature x

commit d87934fe8726c46f0b166d6290a3bf38915d6e75
Author: rasbt <mail@sebastianraschka.com>
Date:   Tue Nov 24 02:44:45 2015 -0500

        added support for feature x
Assuming that it would make sense to group these 3 commits into one, we can execute
$ git rebase -i HEAD~3
which will bring our default git editor with the following contents:
pick d87934f added support for feature x
pick c3c00f6 documented feature x
pick 046e3af fixed setup.py
Since c3c00f6 and 046e3af are related to the original commit of feature x, let's keep the d87934f and squash the 2 following commits into this initial one by changes the lines to
pick d87934f added support for feature x
squash c3c00f6 documented feature x
squash 046e3af fixed setup.py
Now, save the changes in your editor. Now, quitting the editor will apply the rebase changes, and the editor will open a second time, prompting you to enter a new commit message. In this case, we could enter support for feature x to summarize the contributions.
7. Uploading the changes
Push your changes to a topic branch to the git server by executing:
$ git push origin <feature_branch>
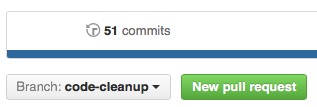
8. Submitting a pull request
Go to your GitHub repository online, select the new feature branch, and submit a new pull request:
Notes for the Developers
Building the documentation
The documentation is built via MkDocs; to ensure that the documentation is rendered correctly, you can view the documentation locally by executing mkdocs serve from the biopandas/docs directory.
For example,
~/github/biopandas$ mkdocs serve
To install and set up mkdocs for the first time, please follow the following steps:
~$ conda install mkdocs --channel conda-forge~$ cd ~/github/biopandas/docs~/github/biopandas$ python mdx_math_setup.py install~/github/biopandas$ conda install mkdocs-bootstrap --channel conda-forge
1. Editing the Tutorials
Please note that documents containing code examples are generated from IPython Notebook files and converted to markdown via
~/github/biopandas/docs/sources/tutorials$ nbconvert --to markdown <file.ipynb>
The markdown file should be placed into the documentation directory at biopandas/docs/sources to build the documentation via MkDocs.
If you are adding a new document, please also include it in the pages section in the biopandas/docs/mkdocs.yml file.
2. Building the API documentation
To build the API documentation, navigate to biopandas/docs and execute the make_api.py file from this directory via
~/github/biopandas/docs$ python make_api.py
This should place the API documentation into the correct directories in biopandas/docs/sources/api.
3. Building static HTML files of the documentation
Build the static HTML files of the biopandas documentation via
~/github/biopandas/docs$ mkdocs build --clean
To deploy the documentation, execute
~/github/biopandas/docs$ mkdocs gh-deploy --clean
Uploading a new version to PyPI
1. Creating a new testing environment
Assuming we are using conda, create a new python environment via
$ conda create -n 'biopandas-testing' python=3 pandas
Next, activate the environment by executing
$ source activate biopandas-testing
2. Installing the package from local files
Test the installation by executing
$ python setup.py install --record files.txt
the --record files.txt flag will create a files.txt file listing the locations where these files will be installed.
Try to import the package to see if it works, for example, by executing
$ python -c 'import biopandas; print(biopandas.__file__)'
If everything seems to be fine, remove the installation via
$ cat files.txt | xargs rm -rf ; rm files.txt
Next, test if pip is able to install the packages. First, navigate to a different directory, and from there, install the package:
$ pip install code/biopandas/
and uninstall it again
$ pip uninstall biopandas
3. Deploying the package
Consider deploying the package to the PyPI test server first. The setup instructions can be found here.
$ python setup.py sdist bdist_wheel upload -r https://testpypi.python.org/pypi
Test if it can be installed from there by executing
$ pip install -i https://testpypi.python.org/pypi biopandas
and uninstall it
$ pip uninstall biopandas
After this dry-run succeeded, repeat this process using the "real" PyPI:
$ python setup.py sdist bdist_wheel upload
4. Removing the virtual environment
Finally, to cleanup our local drive, remove the virtual testing environment via
$ conda remove --name 'biopandas-testing' --all